
Today, I’d like to share with you one of my most recent client projects. My client was an 11 year old boy with a love of the NC Blue Devils, legos and hockey. My challenge was taking all of his favorite things and all the different colors and designing a room that would feel pulled together and organized.

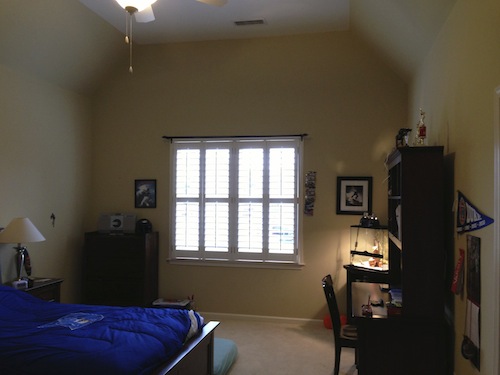
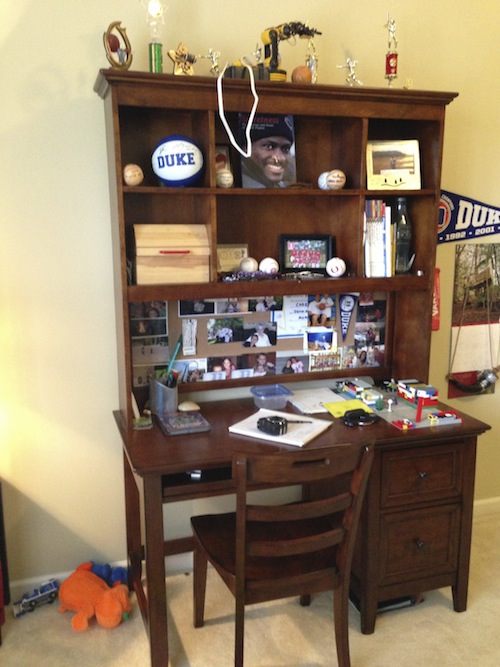
I took these 3 photos on my first visit. We talked about what he wanted to keep and what we could clean out. Most of the furniture was new, so we decided to keep almost everything. Between the Blue Devils and hockey, I had an existing color palette of yellow, blue and red to work with as well as a very tall ceiling. How do you bring all that together and keep everything within our modest budget?
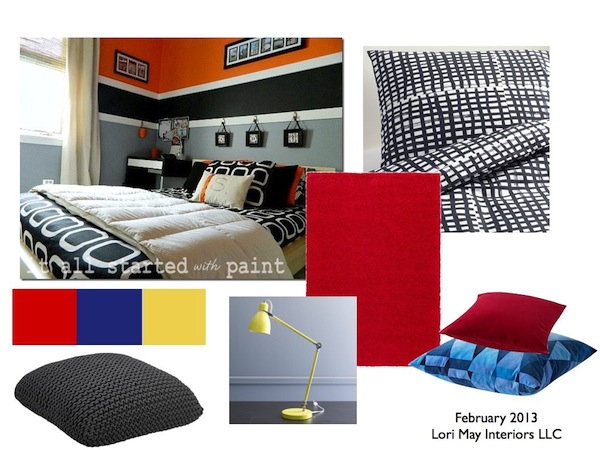
Let’s start with the design plan. You can see that I really wanted to add stripes to the room, so I gave them several options. This plan is a great example of how I like to work with my clients. We took the design plan and modified it to work for them. My young client did not like the yellow lamp or the graphic bedding, so we went with his existing lamp and solid bedding. The plan, however, is still the guide for the overall feel of the room.
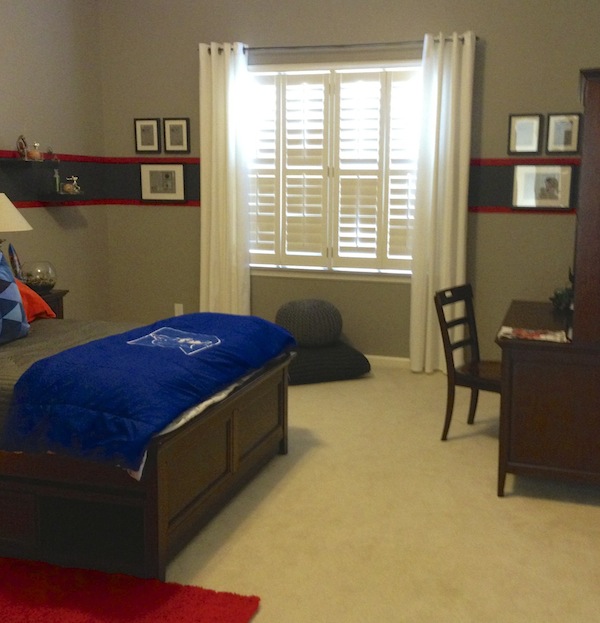
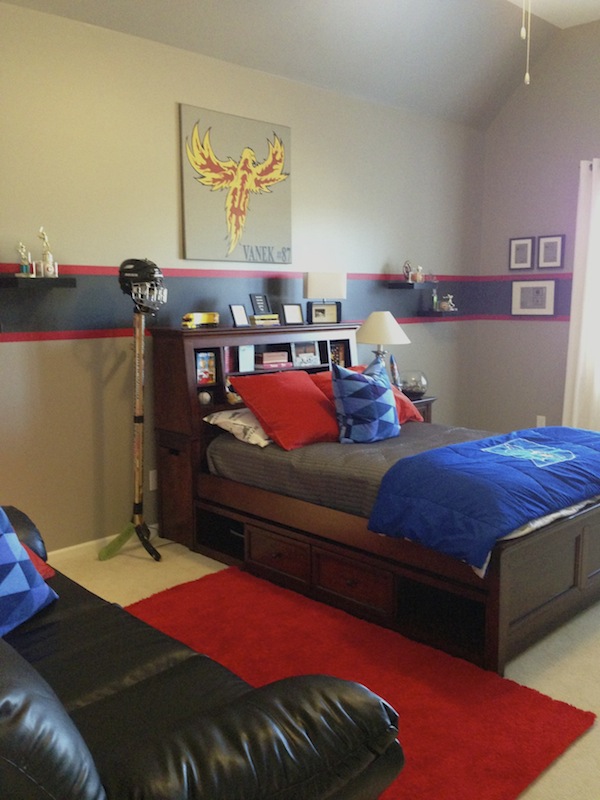
I decided to use paint to unify the strong colors in the room. Gray walls and a charcoal and red stripe brought a new focal point to the room taking the focus away from that tall ceiling. Solid white window treatments softened the plantation shutters without taking anything away from those great stripes.
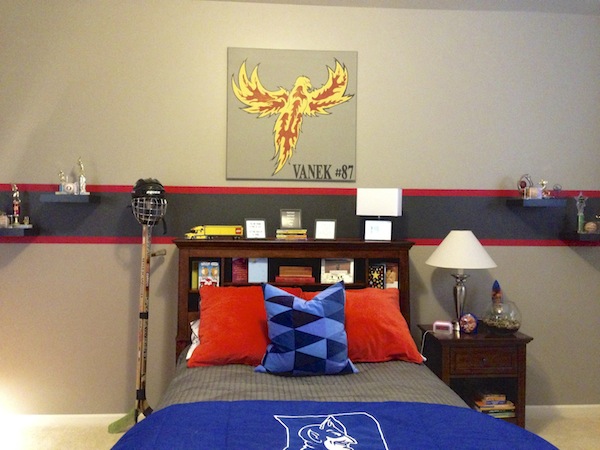
I used red, blue and gray bedding to continue the color palette from the walls to the furniture. The artwork above the bed is a hand made plaque of my client’s hockey mascot. I also added small shelves to hold his trophies and baseballs. These shelves blend into the charcoal stripe. They are functional, but do not overwhelm the space. The lamp to the left of the bed was designed by my client’s mom. How talented is she? She had seen this lamp in a local store and decided to take on the DIY project. I think it turned out great!
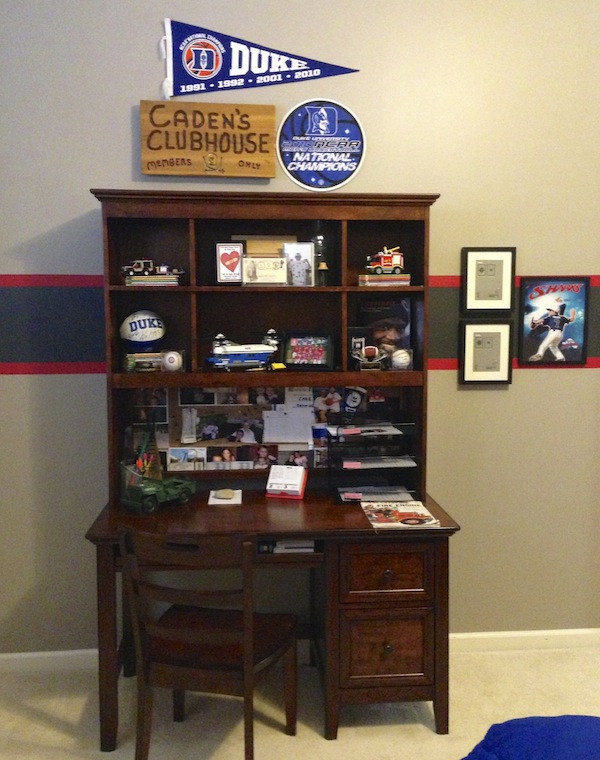
The desk area was decluttered and organized. I took some of my client’s memorabilia and created a small gallery wall above the desk. Remember that a gallery wall does not always have to be full of photo frames. It’s a great way to organize your collections and artwork.
Here’s another shot of the before.
And the after.
I love how it turned out. This project definitely shows how you can take a small budget and still make big changes.
Have a great day!
Love that stripe!! Such a fun space!
Thanks Amanda! It was a fun space to work on!
Lori, I would say this room is a real success!! Great job, love it. Having had three son’s I know any of my boys would have loved this room, great job,
Kathysue
PS Happy Easter Weekend!
Thank you Kathysue! I hope you had a wonderful Easter too!
The room was transformed into the perfect place for this 11 year old young man! One lucky kid!
Thank you Patty! He loved it and that made it all worth it!
Fabulous…what a lucky guy. Bet all his friends like hanging out in his cool room!
PS. Thanks for putting me on your blog roll! Have a great day.